How to Pack a Garage, Shed, and Storage Areas for Moving
Pack heavy tools in manageable loads, protect awkward equipment, and count the supplies your garage actually needs.
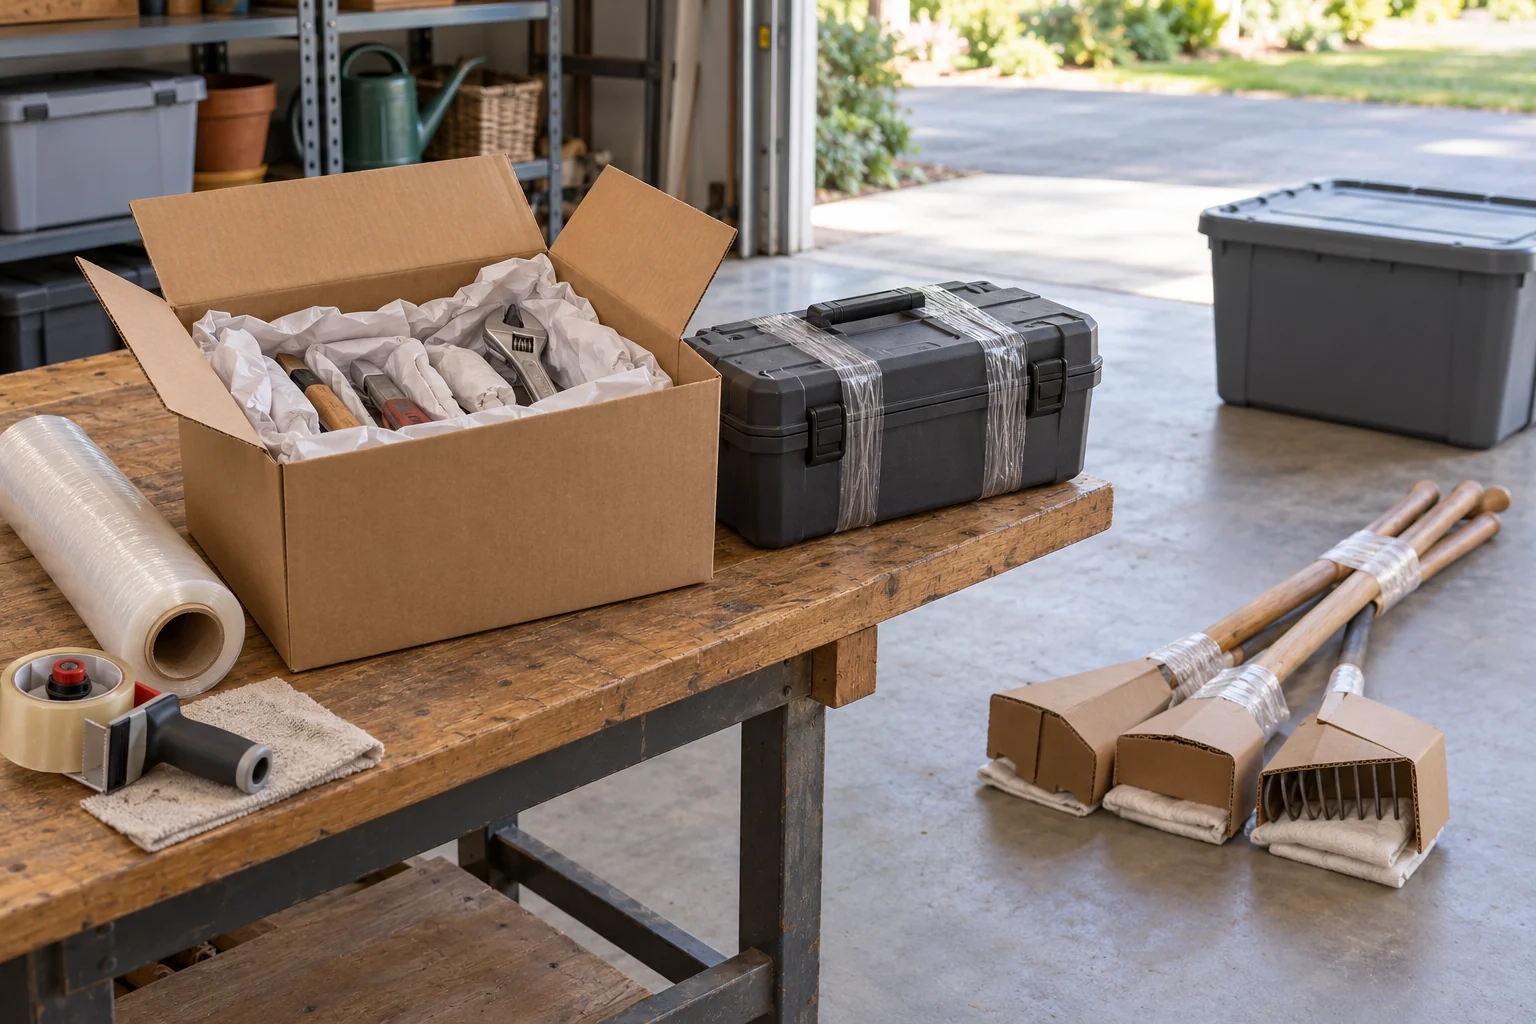
A garage can throw off a moving-supply estimate in two directions. A few shelves of metal tools can fill several small boxes before you make a dent in the room. Bicycles, ladders, and lawn equipment take up plenty of space but may need protection and secure loading rather than another carton.
To pack a garage for moving, sort out restricted materials first, separate items by weight and shape, and test-pack one small tool box before buying the rest. The same process works for a shed, basement workshop, or storage area. These six steps help you choose boxes, use stretch wrap where it helps, and keep essential tools available through moving day.
Step 1: Clear Out Hazardous Items Movers Won't Touch
Check your mover's prohibited and restricted items list before packing garage shelves. Restrictions depend on the carrier, shipment, and destination; a sealed container does not automatically make a product acceptable. For example, United Van Lines distinguishes prohibited materials from restricted items that need advance arrangements.
The “Do Not Pack” Garage List
Set these aside for review instead of putting them in household moving boxes:
- Gasoline, kerosene, lighter fluid, propane cylinders, and other fuels.
- Charcoal and fire-starting products, particularly self-lighting varieties; confirm the carrier's policy.
- Fertilizers, pesticides, herbicides, pool chemicals, and similar garden products.
- Paint, paint thinner, solvents, flammable aerosols, and leaking or unidentified containers.
- Automotive lead-acid batteries and other batteries subject to the mover's restrictions.
Check closed paint cans too. Whether a can is open is only one part of the decision; the product and carrier's rules matter.
Keep products in their original labeled containers while arranging disposal or another approved option. Do not mix leftovers or pour them into a drain or onto the ground. The EPA's household hazardous waste guidance recommends contacting your local environmental, health, or solid-waste agency for disposal options. Arrange this early enough to use an available collection service.
How to Drain and Prep Gas-Powered Equipment
Ask your mover how it requires mowers, trimmers, blowers, and similar equipment to be prepared. United's moving checklist calls for removing gas, oil, and propane from powered items. Follow the equipment manual and the carrier's instructions, using a service professional when needed.
Schedule preparation several days ahead. A fixed 48-hour wait does not establish that equipment is safe or accepted. Let equipment cool before servicing, arrange proper handling of removed fluids, and clean off soil and loose debris. Confirm any destination requirements for outdoor equipment. Keep prepared machinery upright as instructed and tell the movers about it before loading.
Step 2: Estimate Boxes and Supplies for a Garage
Count three groups separately: items that need cartons, items staying in suitable cases or bins, and equipment moving without a box. Photograph each shelf after sorting so hidden drawers and overhead storage make it onto the inventory.
The table below is an illustrative starting allowance for the garage alone, adapted from this guide's planning brief. It is not a measured household average or a reproduction of BoxCount Planner's results. A tool-heavy workshop can need more small cartons and fewer large ones than the room's size suggests.
| Garage load | Small boxes, about 1.5 cu ft | Medium boxes, about 3.0 cu ft | Large boxes, about 4.5 cu ft | Additional supplies to review |
|---|---|---|---|---|
| Light: a few tools and lightly filled shelves | 4–6 | 3–5 | 1–2 | Check availability of 1 roll of heavy-duty carton tape |
| Average: moderately filled shelving and seasonal gear | 8–12 | 6–10 | 3–4 | Review 1 shared stretch-wrap roll and packing paper |
| Heavy: a full workshop or densely filled storage area | 15 or more | 10–15 | 5–8 | Review up to 2 stretch-wrap rolls and cushioning for vulnerable items |
Box volumes are approximate; check the actual dimensions and load rating. Reserve large cartons for light, bulky contents. The tape and wrap entries are stock checks, not mandatory purchases: rolls already allocated to the rest of the home may cover the garage too.
For your household estimate, open the BoxCount Planner moving box calculator and expand Fine-tune your inventory. Under Rooms and storage, choose the appropriate Garage contents level: Lightly filled, Moderately filled, or Very full. Use Basement, attic or storage for separate areas, keeping the same belongings out of both allowances.
These inputs refine the household carton estimate, which also affects tape. Review stretch wrap separately after counting bundles and pieces needing protection; selecting a fuller garage does not itself calculate a dedicated allowance for tool bundles. Record sound bins and fitted cases you already have before deciding how many cartons to buy.
Step 3: How to Pack Hand Tools and Power Tools Safely
Use Small Boxes for Heavy Metal Tools
When packing garage tools for moving, weight usually becomes the limit before volume. Start with small, sound cartons for loose hammers, wrenches, sockets, and similar dense items. Use a fitted case for tools that already have one. The same weight-first approach applies when packing books.
Group screws, nails, and small fittings in secure containers. Wrap or separate tools so metal parts cannot strike each other, and fill movement gaps without forcing the lid shut. Seal the bottom and top according to the carton supplier's instructions.
Check the packed weight on a scale. Do not treat 40–50 lb as a universal safe target: the box rating, condition, contents, and handler's ability can require a much lighter load. Split the contents whenever lifting or controlling the carton is difficult. Extra tape cannot make a damaged or overloaded box suitable.
Preparing Power Tools and Sharp Blades
Unplug corded tools. Following the manual, remove detachable batteries and accessories before packing, and prevent accidental operation. Secure cords without putting strain on their entry points.
Remove bits and detachable blades only where the manufacturer permits safe removal. Use original blade sleeves or rigid guards; sturdy cardboard protection must fully cover the cutting edge and stay in place. Add cushioning outside that guard. Bubble wrap alone can be punctured by a sharp edge.
Discuss cordless tools and batteries with the mover in advance. Protect battery terminals from contact with metal and keep batteries separate from loose screws or nails. The Power Tool Institute's battery guidance also advises following the manufacturer's temperature limits and stopping use of damaged batteries. Do not put a swollen, leaking, or damaged battery into an ordinary moving box. If batteries will travel with you, confirm the rules for your transport method and protect them from heat and damage.
Keep Original Toolboxes Intact
A sound fitted case or portable toolbox may eliminate an outer carton. Check its hinges, latches, handle, and loaded weight. Secure loose contents inside, then use the case's locks, suitable zip ties, or stretch wrap as appropriate to keep it closed. U-Haul's garage-packing guidance describes using mover's wrap to secure toolbox drawers.
A large rolling tool chest needs a separate handling plan. Ask the mover whether drawers must be emptied and how the chest will be moved and secured. Stretch wrap is a closure aid; it is not a lifting handle or a truck restraint.
Step 4: Bundling Long-Handled Tools and Bulky Gear
Rakes, Shovels, and Brooms
Clean and dry long-handled tools, then cover shovel edges and rake teeth with secured rigid protection. Add padding where heads might rub nearby belongings. Keep pointed ends contained throughout handling.
Start with a small, manageable bundle. Four to six lightweight tools may work together, but fewer heavy shovels may be enough. Alternate head directions only when that makes the bundle balanced and keeps protected ends controlled. Otherwise, group tools with similar shapes.
Wrap the handles at several points so tools cannot slide free. If tape is needed, apply it over the protective wrapping rather than directly to finished handles. Keep grips available for carrying.
BoxCount Planner expresses stretch wrap in 20 in × 1,000 ft rolls. A narrower hand roll may be easier for tool handles. Check width and total length when comparing products, and trial-wrap one bundle before reserving whole rolls. Film holds the group together; it provides little cushioning and does not replace load-securing straps.
Shelving Units, Ladders, and Bicycles
Photograph shelving before taking it apart. Follow its assembly instructions, label matching sections, and bag each unit's hardware separately. Attach the labeled bag to protective wrapping on a shelf or keep it in a clearly identified parts carton. Bundle posts without leaving exposed edges.
Fold ladders and engage their locks. Secure loose parts and discuss their loading position with the movers. For bicycles, remove loose accessories, protect the frame and projecting parts, and ask whether the route requires a bicycle carton or additional disassembly. Treat e-bike batteries as a separate transport question.
Use clean padding beneath wrap on vulnerable surfaces, following the material-specific advice in how to protect furniture when moving. Stretch wrap alone will not protect a frame or shelf from impact.
Step 5: Dealing With Existing Plastic Storage Bins
Empty enough of each tote to inspect its base, corners, lid, and contents. Keep a sound bin when its loaded weight is manageable, the lid closes properly, and your mover accepts it. Check for restricted materials even if the bin has been closed for years.
Repack a brittle, cracked, bowed, or overloaded tote. If it flexes excessively when lifted or its lid will not sit flush, reduce the load or change containers. Use small cartons for dense tools and medium cartons for suitable lighter contents; a medium box can become overloaded too.
For an accepted bin, engage its latches and add closure protection if needed. Two vertical passes of stretch wrap can help retain a lid, but check the result rather than assuming two passes suit every bin. Follow the mover's directions, preserve usable handles, and test tape on the plastic before applying it directly.
Keep stacks low and stable, with heavier compatible containers below lighter ones. A household tote is not necessarily designed for a tall moving-truck stack. Our guide to moving boxes versus plastic bins compares those choices. For carton sealing, use the separate packing tape guide; film around a bin does not replace tape on cardboard seams.
Step 6: Label and Stage the Garage First
Start with garage belongings you rarely use, ideally two or three weeks ahead when your schedule allows. Seasonal equipment and stored decorations can often be packed before everyday kitchen and bedroom items. Keep out a small toolkit, cleaning equipment, and anything needed to disassemble furniture. Fit those tasks into your packing timeline.
Create a dry staging area for finished boxes, with a clear route to the exit. A cleared garage can hold cartons from other rooms if it is secure and suitable for their contents. Keep walkways, door operation, and access to utility equipment clear; place restricted materials elsewhere while awaiting approved handling.
Label at least two visible sides with the destination, contents, and a box number. For example:
Add handling notes where useful. A HEAVY label helps handlers identify a load but does not make it safe to lift or stack. Keep tool cartons low on suitable supporting loads, away from fragile items. Use consistent room names with the moving box labeling guide.
Before marking the garage packed, check that:
- Restricted products have an approved disposal or transport plan.
- Powered equipment meets the mover's preparation requirements.
- Tools are secure, sharp edges are guarded, and loads are manageable.
- Batteries have a confirmed packing and transport arrangement.
- Bins close correctly; hardware and equipment parts are labeled.
- The final toolkit stays accessible and the loading route is clear.
Update your supply quantities in BoxCount Planner, subtract what you already have, then use Print Checklist after calculating. Keep the garage task list alongside that supply sheet so both the packing work and the remaining purchases are easy to track.
Use the calculator for a personalized starting estimate. Exact needs vary, so adjust it after you take inventory.
Use the moving supplies calculator